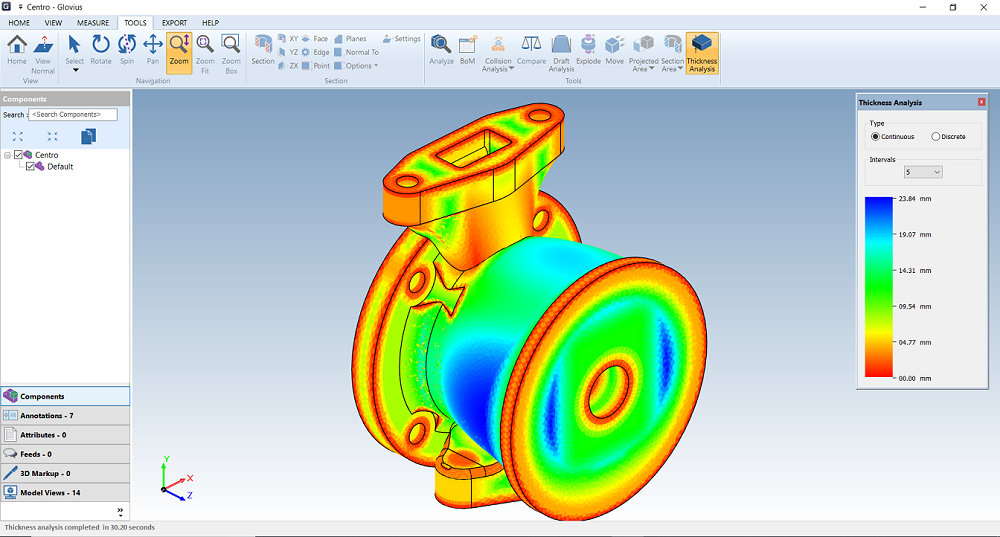
Thickness Analysis of Parts
The ability to determine the material distribution and the corresponding thickness or thinness of a casting part is crucial for its design and manufacturing. Non optimal values of the part leads to issues in its performance during use. Thin wall sections may be structurally weak causing the component to fail during operational use while over compensated thick portions lead to an increase in the weight of the component and hence the subsequent cost to manufacture.
In Glovius you can quickly identify the material distribution using the Thickness Analysis tool. The tool calculates the thickness using the Ray method or the Sphere method. Each of the method is suitable for a specific use case.
- Ray method is typically suitable for finding thin wall sections and helps detect edges
- Sphere method is useful for identifying thick sections that may warp or deform during casting process

Calculate the Thickness of a Part
Steps to calculate the Thickness Analysis of Parts :
- Open a CAD part.
- Navigate to the ‘Tools’ tab in Glovius. If needed, change the Thickness Analysis method from the Settings dialog.
- Click on ‘Thickness Analysis’ tool
- Once the results are computed, you would notice the color coded component and the results pane that denote the value intervals.
- You can change the display of color coding and the number of value intervals from the pane.
- Choose the ‘Discrete’ type to apply your own interval values and colors. For example, if you want to ignore all thickness values more than say 3 mm, you can set it as an interval to focus on the thinner regions in your design.
Download Glovius today and use Thickness Analysis on your casting parts and identify probable design issues.

